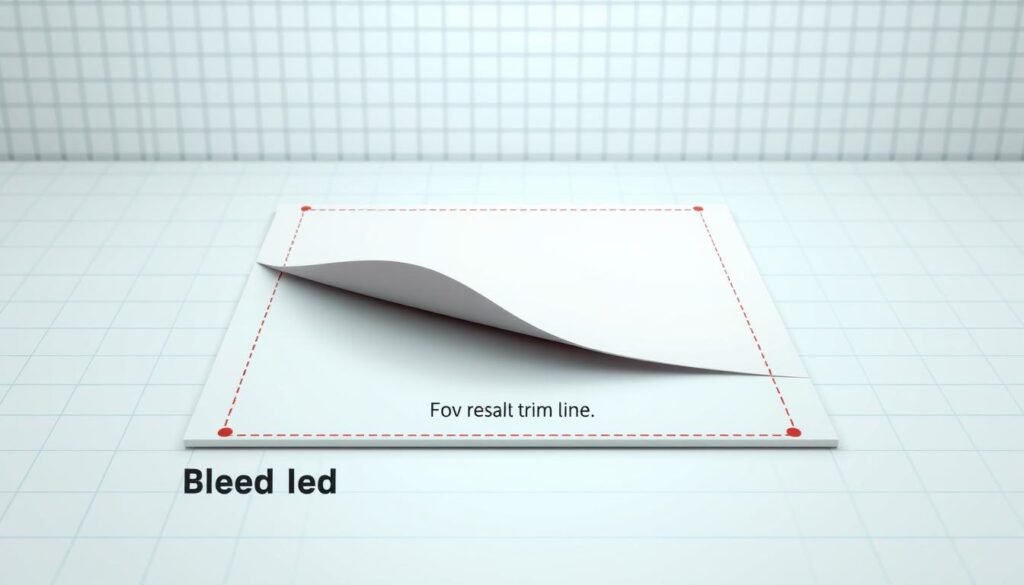
I answer this straight away: what does bleed mean in graphic design is the extra artwork that runs past the trim so color and images reach the page edges after cutting.
I use this approach daily when I prepare files for printing. Printers output on a larger sheet and trim to the final size, so a proper margin of bleed prevents white slivers at the edges.
Industry practice calls for 1/8 inch (~3 mm) of bleed on every side and a safety zone at least 1/8 inch inside the trim for important text and logos. A framed border should sit about 1/4 inch from the trim to avoid looking uneven.
Full bleed makes business cards, brochures, and posters look professional. Poorly prepared files are a top cause of order delays because printers often request rework when safety and bleed are missing.
Table of Contents
ToggleKey Takeaways
- Bleed is the extra artwork beyond the trim that prevents white edges.
- Set 1/8 inch (~3 mm) bleed on all sides and keep important elements inside the safety zone.
- Printers cut from larger sheets, so correct setup avoids rework and delays.
- Full bleed produces clean edge-to-edge color on cards, brochures, and posters.
- Place borders at least 1/4 inch from the trim to keep them even after cutting.
What does bleed mean in graphic design and why it matters for print
I always set up my files so color and imagery extend past the cut line for true edge-to-edge prints. Full bleed printing ensures the background or photo runs to the page edge with no white margin after trimming.
Bleed links directly to the trim: trim is the final cut line and the bleed is the extra area I add beyond it. That extra area prevents thin white slivers that appear when the paper shifts slightly during the print process.
How I protect text and save time
I add 0.125 inch of bleed on every side and keep critical text and logos at least 0.125 inch inside the trim as a safety margin. For a U.S. letter, I design at 8.75 x 11.25 inches for an 8.5 x 11 final.
Printers ask for full bleed so orders move smoothly. Proper margins and safety space reduce rework, save time, and keep print quality high.
- I extend backgrounds into the bleed area.
- I mark the trim and keep text inside the safety zone.
- I check files before sending to avoid delays in the print process.
The anatomy of a print-ready file: bleed, trim line, crop marks, and safety margins
When I prep a print-ready file, I make each line and area obvious so shops can cut without guessing. I mark the outer artwork, the trim line, and the inner safety margin before exporting.
Bleed margin explained: I extend background colors, images, and artwork 0.125″ (~3 mm) past the trim so the final product trims cleanly at the line. This prevents unwanted white edges after printing.
Trim line and final size: The trim is the exact line where the page is cut. For an 8.5″ x 11″ final size I build files at 8.75″ x 11.25″ to include full bleed on all sides.
Safety margin: I keep text, logos, and critical elements at least 0.125″ inside the trim. For framed borders I push them 0.25″ from the trim to keep edges even.
“Labeling bleed line, trim line, and safety line in the file cuts confusion at prepress and speeds production.”
- I usually save full-bleed files without crop marks to avoid stray marks appearing after trim.
- I record dimensions and margins in the file so handoffs are consistent and predictable.
How I set up bleed by software to make sure files print correctly
I walk through each app so files leave my desk ready for print with correct margins and color.
Adobe Photoshop
Create the canvas at full bleed dimensions: add 0.25 inch to both width and height so the canvas includes 0.125″ on each side. Set resolution to 300 PPI and switch to CMYK for reliable printing.
I stretch backgrounds and raster artwork to the outer edge and keep type inside the safety margin. Before export I confirm crop marks are not flattened into the image unless the shop asks for them.
Adobe Illustrator
I start a new document at the final trim size, then set the bleed fields to 0.125″ on all sides. Use CMYK color mode and set Raster Effects to High (300 ppi) for crisp vector-to-raster effects.
I snap shapes and images to the bleed line while keeping logos and text inside the safety area so the print process respects tolerances.
Adobe InDesign
I create the doc at trim size, open the Bleed and Slug panel, and type 0.125″ for top, bottom, left, and right. Align master frames to the trim and let color blocks run out to the bleed margin for consistent full bleed across pages.
Final check: verify backgrounds extend to the bleed, critical content sits inside the safety margin, and export presets keep CMYK with bleed included.

| App | Canvas / Artboard | Color & Resolution | Key step |
|---|---|---|---|
| Photoshop | Full bleed size (+0.25″ total) | CMYK, 300 PPI | Extend raster artwork to outer edge; keep type inside safety margin |
| Illustrator | Trim size; bleed = 0.125″ all sides | CMYK; Raster Effects = High (300 ppi) | Snap vectors to bleed line; avoid embedding crop marks unless requested |
| InDesign | Trim size; set Bleed & Slug to 0.125″ | CMYK; page-based export | Use master items for consistent full bleed across files and pages |
“Confirm backgrounds extend to the bleed and critical content stays within the safety area before export.”
Bleed printing mistakes I avoid and the best practices I follow
I follow a strict checklist so files leave my desk ready for press without surprises. This keeps orders on schedule and reduces reprints.

Don’t fake bleeds with a white border
I never use a white border as a substitute. Minor shifts during trimming can reveal that border and ruin a clean edge on paper.
Keep critical text and images safe
All important text and images stay inside the safety margin. That simple rule protects logos, contact info, and small copy from being cut.
Avoid crop marks inside the bleed
Crop marks and cut marks belong outside the bleed area or only on a printer’s separate guide. If they sit too close, marks may appear on the final product.
Resizing the wrong way
I do not merely scale a file to new dimensions. I reflow and check layout so type, artwork, and borders remain safe after the size change.
Plan for movement and special cases
Print and trimming allow slight movement. Proper margins and correct bleed margins save time and prevent delayed orders.
Special cases: flexible packaging can use full bleed printing, but many projects need a smaller bleed (often ≤5 mm). I confirm specs with printers for atypical products.
- Quick checklist: extend backgrounds to the bleed line, keep text inside safety margin, avoid marks in the bleed, rework layouts for new dimensions, and confirm printer specs before export.
Conclusion
I wrap backgrounds past the cut line so every page edge prints cleanly. For clean full bleed results I extend art 1/8 inch beyond the trim and keep key text and images at least 1/8 inch inside the cut line.
Practical rules: build an 8.75 x 11.25 file for an 8.5 x 11 final, keep margins consistent, and avoid crop marks when full bleed is set.
I keep files organized, confirm dimensions, and match the shop’s specs before export. This checklist saves time, cuts waste, and makes business and product prints look professional.
Final thought: consistent setup and a safety-first layout turn tricky bleed printing into a routine part of solid design work.

